
![]()
是一個免費開放式的SSL提供者,關於它的簡介如果需要詳細的請自行google咯,我這裡的案例是以我自己的Centos 6 及 Apache 來做示範。
1 在Centos 6 安裝以下Python2 元件
Install Epel Repository
yum install epel-release
Install IUS Repository
rpm -ivh https://rhel6.iuscommunity.org/ius-release.rpm
Install Python 2.7 and Git
yum –enablerepo=ius install git python27 python27-devel python27-pip python27-setuptools python27-virtualenv -y
2 使用Git 抓取安裝包 放在 /root 目錄底下
cd /root/

git clone https://github.com/letsencrypt/letsencrypt
3 進入 letsencrypt資料夾,並初始化,記得停止Apache服務
cd letsencrypt

./letsencrypt-auto
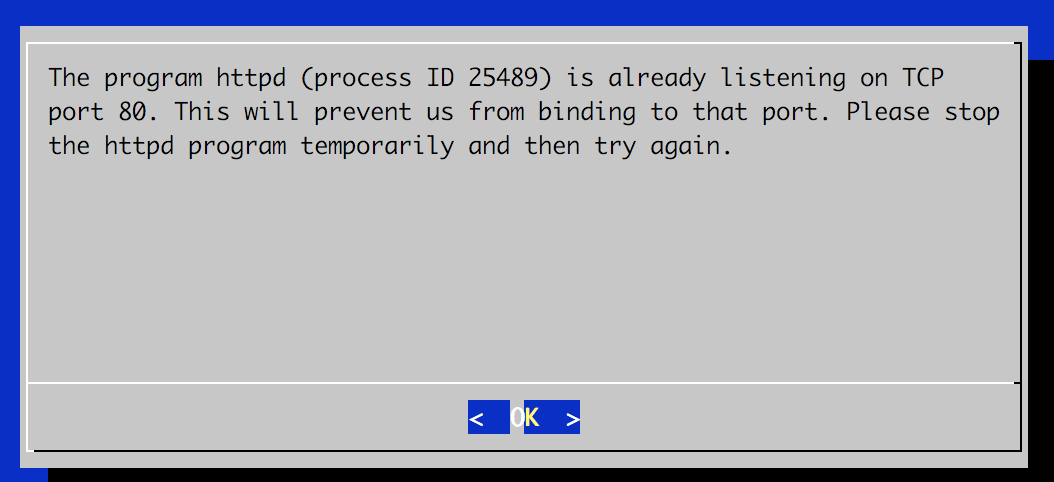
如果出現這個是沒有暫停Apache服務哦
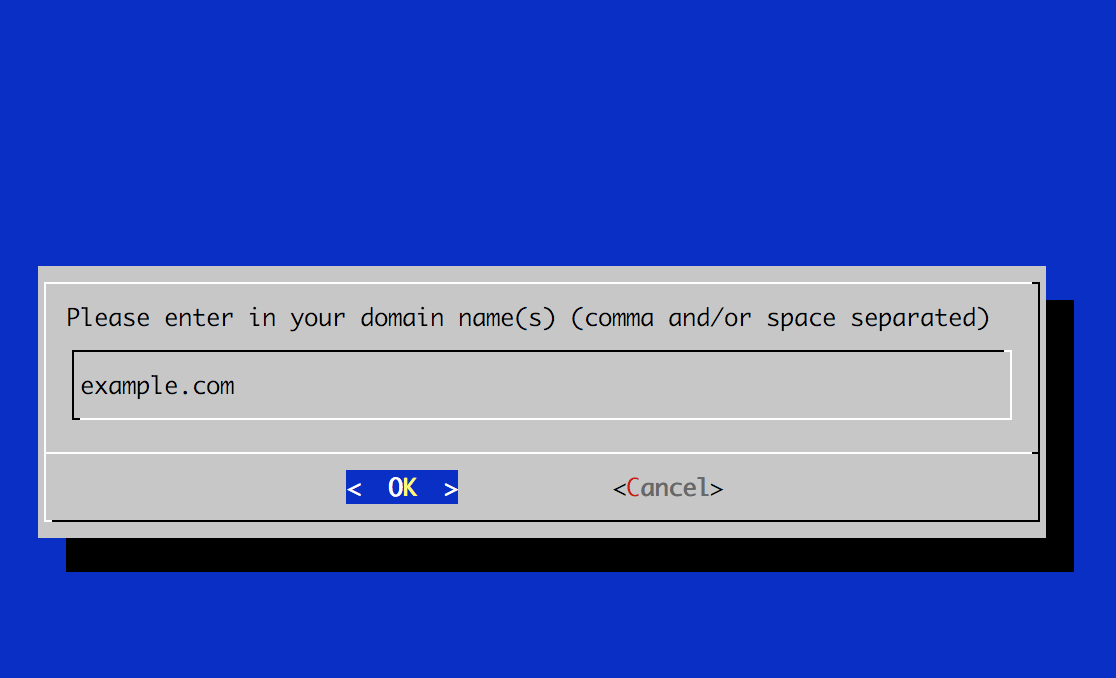
4.執行這個以生成 example.com的ssl相關文件
./letsencrypt-auto certonly
會跳出這個GUI畫面,輸入你的網址 example.com
5.把Apache Conf的mod_ssl打開
6.在Apache Vhost example.com 443的conf裡面添加以下資料
SSLEngine on

SSLCertificateFile /etc/letsencrypt/live/example.com/cert.pem

SSLCertificateKeyFile /etc/letsencrypt/live/example.com/privkey.pem

SSLCertificateChainFile /etc/letsencrypt/live/example.com/chain.pem
這樣就搞定啦~~ 可以把Apache啟動咯
我這裡的筆記的情況是會自動把 http://example.com 轉到 https://example.com 這個情況,我會在Apache的Vhost 創建兩個 example.com 的文件
- Example.com Port 80的 裡面添加這個規則
RewriteEngine On
RewriteCond %{HTTPS} off
RewriteRule (.*) https://%{HTTP_HOST}%{REQUEST_URI} [R,L]
那麼再次重開Apache試看看,是否進入 http://example.com會自動轉到https://example.com